
Miracle Stationery Box for Operation Smile

I originally made this stationery box to send in with my Extravaganza teaching application a couple months ago. (Extravaganza is one of the highlights of the Close to my Heart Convention where we have 7 back-to-back, 20 minute, high energy creative classes. It is so much fun!) After I received the info that I was chosen to teach and what my topic was, I decided to donate the box to the Operation Smile Auction, which is another highlight at Convention. The CTMH Art Department and a handful of wonderful Consultants create and donate some fabulous projects each year to raise money for Operation Smile which is CTMH’s chosen charity. Click here to read more about Operation Smile.

Back

I have to tell you a funny story about this project. (I know many of you already know the story because I was pleading for help during the process. LOL!) To create the inside of the box, I had to use a lot of adhesive, as you can imagine. I had just bought a new ATG gun (you know the cute new pink one) and some rolls of tape to go with it. Well, apparently the tape I bought had a strong smell to it and I didn’t realize it until after the box was finished. Every time I opened the box, I was hit with a funky plastic type smell. I finally realized that it was the tape I had used. I tried everything to get rid of the smell. I tried baking soda, a fabric softener, letting it air outside for 2 days, etc. Finally the deadline to send in my application came around and I had to mail it in. I was tempted to send it in with a note apologizing for the smell and promising that if I was chosen to teach, I would use a different adhesive to make my projects. *Ü*
Have you ever created something and thought to yourself, “Boy, this stinks?” Well my project literally did! LOL! Thankfully I am pretty sure that the smell is gone by now and the person who wins the box should be able to enjoy the stationery without the wonderful plastic-y scent.

…and inside of the box.


There is a matching notebook.

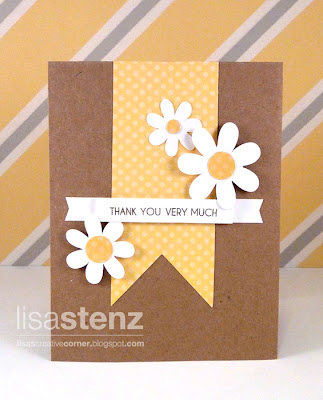
The cards and envelopes are all ready to be personalized with the label of your choice.

Each envelope flap is stamped with a subtle border.

This is what the empty box looks like inside. (Boy those dividers sure did take a long time to make.)


All supplies used are CTMH unless otherwise noted:
Paper: Miracle Collection, Kraft Cardstock
Stamps: Miracle (from the Miracle Workshop on the Go Kit), Salutation Seals
Inks: Heavenly Blue, Sweet Leaf, Desert Sand
Other: Box and Tins (purchased at craft store); Various Sweet Leaf, Heavenly Blue, Chocolate Ribbon; Scallop Scissors; 2″ Scallop Punch, White Daisy Just Blooms; Cricut Machine with SCAL software
WOW, Lisa!! Your project is absolutely beautiful! You are so very talented. I can't wait to see it in person at Convention! 🙂 Thanks so much for sharing!
The stationery box is sure to be treasured by whomever is fortunate enough to receive it. You are amazingly creative!
Love it and think I'll use idea to do that to CTMH square storage box.
I love it! The color is amazing and the box is just beautiful!
This is really pretty! I can't wait to see it in person at Convention – maybe we'll run into each other again this time!
What a fabulous project! Who ever gets it will be very lucky!
The infamous toxic project! Smile… I'm glad that the funky smell has disappeared – this is too gorgeous not to be enjoyed by everyone at convention :o)
OMGosh LIsa! This box is super fabulous! I love how you made the little dividers so everything stays in its place! How fab!
where could one purchase a 'box' to alter? LOVE it!
Flat out A-MAZ-ING! I love it! I'd take it even if it did still smell! 🙂
I'd love to win this, stink and all! 🙂
Lisa, this is fabulous!!! So wish I was going to Convention to be your student!! Have fun! Can't wait to hear about all the new goodies!
WOW, WOW, WOW! So adorable, Lisa! I love it! There's NO WAY you could say this project "stinks", even if it did smell!